SSH access into PSI-LAN

Incoming SSH connections to systems within the PSI network will only be permitted through a jumpsystem (hop.psi.ch).

PSI employees with an account can use the jump system by default. Non-PSI employees have to apply via their responsible contact person for an external-employee account.

There are several methods for SSH connections using Unix systems.

Method 1
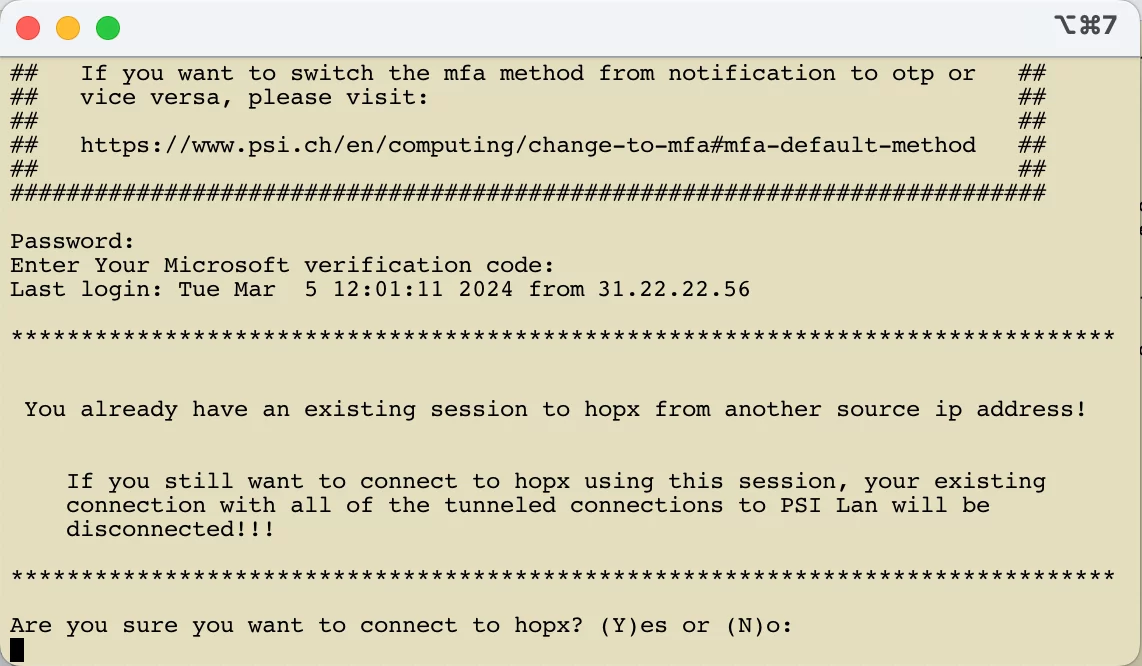
For every SSH connection into the PSI-LAN, an initial SSH connection to hop.psi.ch must be made. From there, you make a new SSH connection to the target system within the PSI-LAN.


Example for the connection establishment:
Please replace the <user> with your actual username.

ssh to hop.psi.ch $ ssh <user>@hop.psi.ch $ <user>@hop.psi.ch's password: and next to the system within the PSI-LAN $ ssh <user>@sshserver.psi.ch $ <user>@sshserver.psi.ch's password: Alternative command: $ ssh -t <user>@hop.psi.ch ssh -t <user>@sshserver.psi.ch <user>@hop.psi.ch's password: <user>@sshserver.psi.ch's password: [<user>@sshserver ~]$ Method 2
For those who wish to make multiple SSH connections to different systems within the PSI-LAN, this method is most appropriate.


All SSH connections to the PSI-LAN go through a SSH tunnel to hop.psi.ch. For this method, you have to make some adjustments to the client system.

First ensure the ~/.ssh/config file exists, and has octal 600 permissions. mkdir ~/.ssh/tmp touch ~/.ssh/config chmod 600 ~/.ssh/config

adjust the ssh ~/.ssh/config as follows: ControlMaster auto ControlPath /home/<user>/.ssh/tmp/%h_%p_%r Protocol 2 # The following can also be specified in the host-based sections below. ForwardX11 yes ForwardX11Trusted yes ForwardAgent yes host hop hop.psi.ch hostname hop.psi.ch user <PSI-user> host sshsrv1-psi-internal hostname sshserver1.psi.ch user <user> ProxyCommand ssh -A -W %h:%p hop.psi.ch host sshsrv2-psi-internal hostname sshserver2.psi.ch user <user> ProxyCommand ssh -A -W %h:%p hop.psi.ch host sshsrv3-psi-internal hostname sshserver3.psi.ch user <user> ProxyCommand ssh -A -W %h:%p hop.psi.ch The connection to internal systems is made via two steps.

Step no. 1, ssh to hop.psi.ch $ ssh <user>@hop.psi.ch $ <user>@hop.psi.ch's password: This connection establishes the tunnel to hop.psi.ch and must be left open during the entire lifetime of the connection(s) to system(s) within the PSI-LAN!

Step no. 2, ssh to the systems in the PSI-LAN $ ssh sshsrv1-psi-internal $ <user>@sshserver1.psi.ch's password: $ ssh sshsrv2-psi-internal $ <user>@sshserver2.psi.ch's password: $ ssh sshsrv2-psi-internal $ <user>@sshserver3.psi.ch's password: All three connections will be sent through the tunnel to hop.psi.ch, and from there to the destination systems.
SSH connections from windows systems are only possible using method 1, as described above. Again here, an initial connection to hop.psi.ch must be established. Putty allows us to set this up with little effort.

Example: ssh login to llc.psi.ch

Fill in the field Host Name (or IP address) the name of the jumpsystem hop.psi.ch. In the Field Saved Sessions type in a description of the connection. For example llc.psi.ch via hop.psi.ch.


Then choose Category SSH in the left column. Type in the command ssh llc.psi.ch into the field Remote command.


Go back to Category Session and save the settings with a click to save.


To make the connection, you have to click Open. Please replace the <user> with your actual username. The password for the useraccount will be requested twice. Once for the login to hop.psi.ch


..and afterwards for the login to llc.psi.ch.


After you have entered the passwords successfully, you have access to llc.psi.ch


Upon logout from llc.psi.ch, both connections (to hop.psi.ch and llc.psi.ch) will be closed.
With the help of SSH tunnelling, internal services (remote desktop, vnc, smb etc.) are usable through the jumpsystem hop.psi.ch. It should be noted, that not all users of the jumpsystem get the same connection privileges: depending on the type of user account you possess, varying degrees of reachability will be available.

PSI employee
PSI employees can tunnel the following TCP connections through hop.psi.ch into the PSI-LAN:
TCP Port Number used for
22 ssh
80/443 http(s)
445 CIFS Windows file server (e.g. fs00, fs01 or fs02)
>1023 e.g. for rdp, vnc etc.
External Users
External users can tunnel the following TCP connections through hop.psi.ch into the PSI-LAN:
TCP Port Number used for
22 ssh
3389 rdp
5900 vnc
Additional connections can be allowed upon request.
Tunnelling in Windows works via PuTTY. Fill in the field Host Name (or IP address) the name of the jumpsystem hop.psi.ch. In the Field Saved Sessions type in a description of the connection. For example hop-tunnel.


Then choose Category SSH in the left column. Fill in the field Source port e. g. a local port 9000 and in the field Destination the destination system with its port. In this case winterm3:3389, for a remote desktop connection to winterm3.psi.ch. Then click Add to add the tunnelling information to the configuration.


Go back to Category Session and save the settings with a click to save. After the SSH connection to hop.psi.ch is established, start your locally-installed remote desktop client and connect to localhost:9000.


The RDP connection will be sent through the ssh tunnel to hop.psi.ch, and from there to winterm3.psi.ch in the PSI-LAN.


There are several method for tunnelling using Unix systems too.

Method 1, command line

ssh -L 9000:winterm3.psi.ch:3389 <user>@hop.psi.ch $ <user>@hop.psi.ch's password:

After successful login to hop.psi.ch, port 9000 will be listening on the local client system. If you connect with a locally-installed remote desktop client to port 9000, the connection will be sent through the tunnel via hop.psi.ch to winterm3.psi.ch. E. g. with

$ rdesktop localhost:9000

Method 2, adjust the .ssh/config
For those who wish to make multiple protocol connections (RDP, CIFS, etc) to different systems within the PSI-LAN, this method is most appropriate.
 

adjust the ssh client configuration (see above):

~/.ssh/config ControlMaster auto ControlPath /home/<user>/.ssh/tmp/%h_%p_%r Protocol 2 # The following can also be specified in the host-based sections below. ForwardX11 yes ForwardX11Trusted yes ForwardAgent yes host hop.psi.ch hostname hop.psi.ch user <PSI-user> # Forward RDP to winterm3.psi.ch LocalForward 9000 winterm3.psi.ch:3389 # Forward RDP to pc8699.psi.ch LocalForward 9001 pc8699.psi.ch:3389 # Forward SMB to Fileserver fsX.psi.ch LocalForward 9445 fsX.psi.ch ...

Once the connection to hop.psi.ch is established, the local tunnelling ports 9000, 9001 and 9445 will be available for the configured connections.

The jumpsystem hop.psi.ch can also be used as socks5 proxy for dynamic tunnelling. This allows, for example, multiplexing several connections to different internal webservers, without the need of a separate tunnel to each webserver.

Example with windows

With PuTTy you can add the settings for dynamic tunnelling to the already-defined connection profile hop.psi.ch. Choose in the left column Category SSH -> Tunnels. Fill in the field Source port e. g. a local Port 9999, leave the field Destination blank, and activate the Option Dynamic. Click Add to confirm the settings.


Don't forget to save the connection profile. After successful login to hop.psi.ch, port 9999 will be listening on the local client system. Now you can change the proxy settings of the firefox browser and set SOCKS Host: localhost Port: 9999. It is recommended to fill in the field No Proxy for: every domainname, which should be contacted directly without sending the requests over hop.psi.ch, e. g. localhost, 127.0.0.1, .ethz.ch, .com

Attention: Using hop.psi.ch you can only connect to PSIs internal websites. Connections to websites outside the PSI address range won`t be forwarded!!


Tip If you use a laptop and would like to keep your browser configuration to access internal websites from outside PSI, it is recommended to use two different browsers. One for the access through hop.psi.ch with its socks5 configuration, and one for pure internal connections within the PSI-LAN without a connection through hop.psi.ch.

Example with Unix

Method 1, command line

ssh -D 9999 <user>@hop.psi.ch $ <user>@hop.psi.ch's password:

After successful login to hop.psi.ch, port 9999 will be listening on the local client system. Now you can use this port as a socks5-proxy. Please have a look at the description for Windows systems above.

Method 2, adjust the .ssh/config
For the adjustment of the ssh configuration file you have to add the row

DynamicForward 9999

SSH-client configuration file:

~/.ssh/config ControlMaster auto ControlPath /home/<user>/.ssh/tmp/%h_%p_%r Protocol 2 # The following can also be specified in the host-based sections below. ForwardX11 yes ForwardX11Trusted yes ForwardAgent yes host hop.psi.ch hostname hop.psi.ch user <PSI-user> DynamicForward 9999 # Forward RDP to winterm3.psi.ch LocalForward 9000 winterm3.psi.ch:3389 # Forward RDP to pc8699.psi.ch LocalForward 9001 pc8699.psi.ch:3389 # Forward SMB to Fileserver fsX.psi.ch LocalForward 9445 fsX.psi.ch ...

After successful login to hop.psi.ch, local port 9999 is ready to use for the dynamic tunnelling.

Hint for macOS/Mac OS X Users
If you would like to access internal PSI websites using the safari browser, you will have to setup the socks-proxy through the system wide network preferences. In the network preferences, choose the active network connection (WLAN, ethernet...) and open Advanced -> Proxies. Then set the Socks-Proxy Port to 9999.


Attention: These settings are globally active for any network-using application on the mac system. E. g. this means to the applications mail and calendar, too. Any connections from these applications will also be sent through the socks-proxy. This could lead to connection problems if an application tries to reach a server outside of PSI. To circumvent this behaviour, you will have to exempt from proxy-usage all connections to the external server with entries in the field Bypass proxy settings for these Hosts & Domains:.
Occasionally, a target system within PSI will alert the user that the SSH host key has changed. The warning assumes this is malicious: [user@hop ~]$ ssh user@targethost @@@@@@@@@@@@@@@@@@@@@@@@@@@@@@@@@@@@@@@@@@@@@@@@@@@@@@@@@@@ @ WARNING: REMOTE HOST IDENTIFICATION HAS CHANGED! @ @@@@@@@@@@@@@@@@@@@@@@@@@@@@@@@@@@@@@@@@@@@@@@@@@@@@@@@@@@@ IT IS POSSIBLE THAT SOMEONE IS DOING SOMETHING NASTY! Someone could be eavesdropping on you right now (man-in-the-middle attack)! It is also possible that a host key has just been changed. The fingerprint for the RSA key sent by the remote host is 6e:45:f9:d8:af:33:3d:a1:a5:c7:76:1d:02:f8:77:00. Please contact your system administrator. Add correct host key in /home/user/.ssh/known_hosts to get rid of this message. Offending RSA key in /home/user/known_hosts:4 RSA host key for targethost has changed and you have requested strict checking. Host key verification failed. What this warning usually means (in lieu of 'targetsystem' really having been compromised) is that targetsystem's ssh host key has changed for one of the following reasons:
  1. The system was re-installed (thus sshd had a new host key generated to work with)
  2. The administrator of the system has intentionally re-generated the ssh host key
In both cases, the new host key will need to be accepted by the user. A tool is provided to do just this called kd, which stands for "key delete". [user@hop]$ kd usage: kd [host or IP] This program will delete a host key from your ~/.ssh/known_hosts. You should use this program when a destination host has been rebuilt, or the host SSH key on that system has been regenerated. Example usage: [user@hop]$ kd mybox # Host mybox found: line 2 type ECDSA /home/user/.ssh/known_hosts updated. Original contents retained as /home/user/.ssh/known_hosts.old [user@hop]$ *NOTE* You are required to accept the host's SSH key again on the next connection! Please bear this in mind when executing your next tunnel to the destination host! [user@hop]$

One invokes kd as follows, giving the hostname or IP address:

1 Delete the host key [user@hop]$ kd targethost # Host targethost found: line 4 /home/user/.ssh/known_hosts updated. Original contents retained as /home/user/.ssh/known_hosts.old 2 Reconnect to the host to accept new key [user@hop]$ ssh targethost The authenticity of host 'targethost (129.129.123.123)' can't be established. ECDSA key fingerprint is f5:64:8e:a4:f1:6f:dc:c3:57:01:e6:e8:ec:ae:95:ff. Are you sure you want to continue connecting (yes/no)? yes Warning: Permanently added 'targethost,129.129.123.123' (ECDSA) to the list of known hosts. user@targethost's password: [user@hop]$